How To Install Android SDK Tools On Ubuntu 18.04
It provides all the steps required to install Android SDK Tools on Ubuntu 18.04 LTS without using Android Studio.
In this tutorial, we will discuss all the steps required to install Android SDK Tools, SDK Manager, and AVD Manager on the popular Linux distribution i.e. Ubuntu 18.04 with Java 15. This tutorial provides the steps to install Android SDK Tools on Ubuntu 18.04 LTS, though the steps should be the same for other versions of Ubuntu and Linux systems.
This post is useful for the developers using Android SDK Tools with other IDEs without installing Android Studio for the use cases including hybrid app development using Ionic. It also assumes that a valid JAVA_HOME environment variable exists pointing to the installation directory of Java. You may follow the Java installation tutorials written by us including How To Install Java 8 On Ubuntu, How To Install Java 15 On Ubuntu, and How To Install OpenJDK 15 On Ubuntu.
In case you are interested in developing Android applications using Android Studio, you can also follow the other tutorials written by us including How To Install Android SDK Tools On Windows, How To Install Android Studio On Windows, and How To Install Android Studio On Ubuntu 18.04.
You may also be required to execute the below-mentioned command in case you have set the options previously for Java 9 or Java 10.
# The saviour command
unset JAVA_OPTS
Notes: The Ubuntu 20.04 LTS version of this tutorial is available at - How To Install Android SDK Tools On Ubuntu 20.04. You may continue this tutorial for Ubuntu 18.04 LTS.
Download SDK Tools
Open the download tab of Android Studio and scroll down to the Command line tools only section. This section shows various options to download the SDK tools as shown in Fig 1.
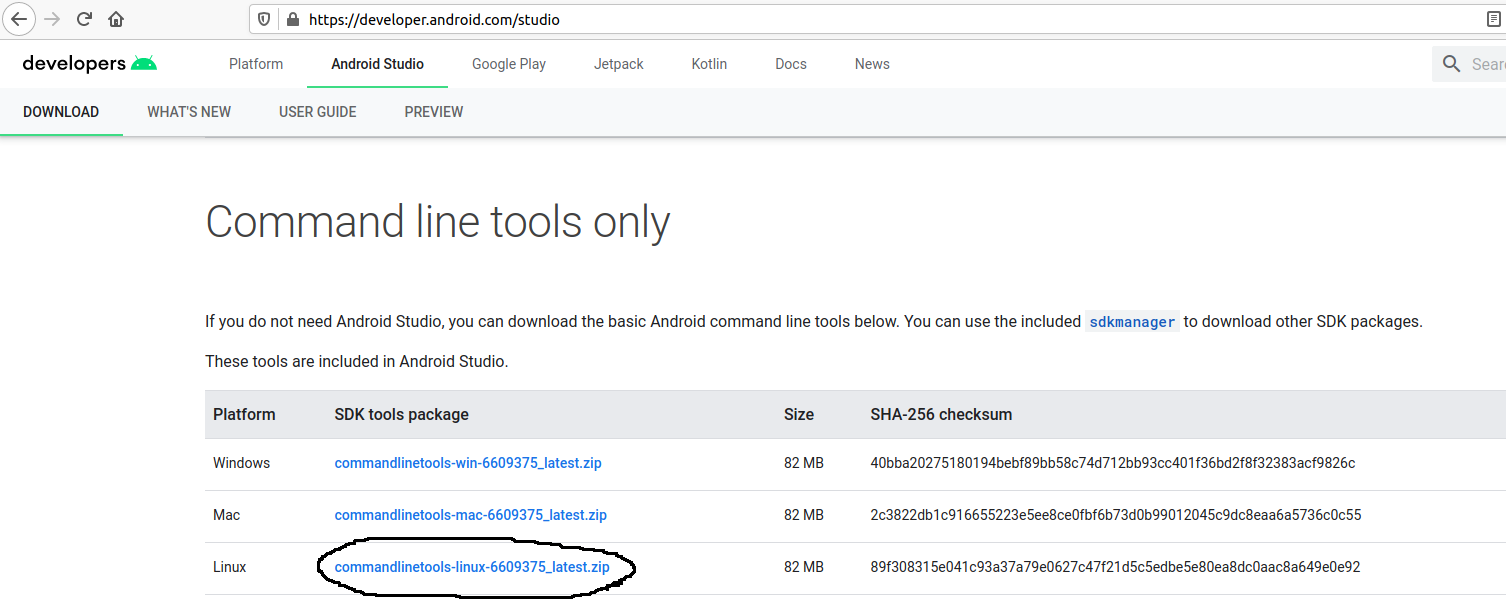
Fig 1
Click on the Download Link as highlighted in Fig 1. It will ask to accept the Terms and Conditions as shown in Fig 2.
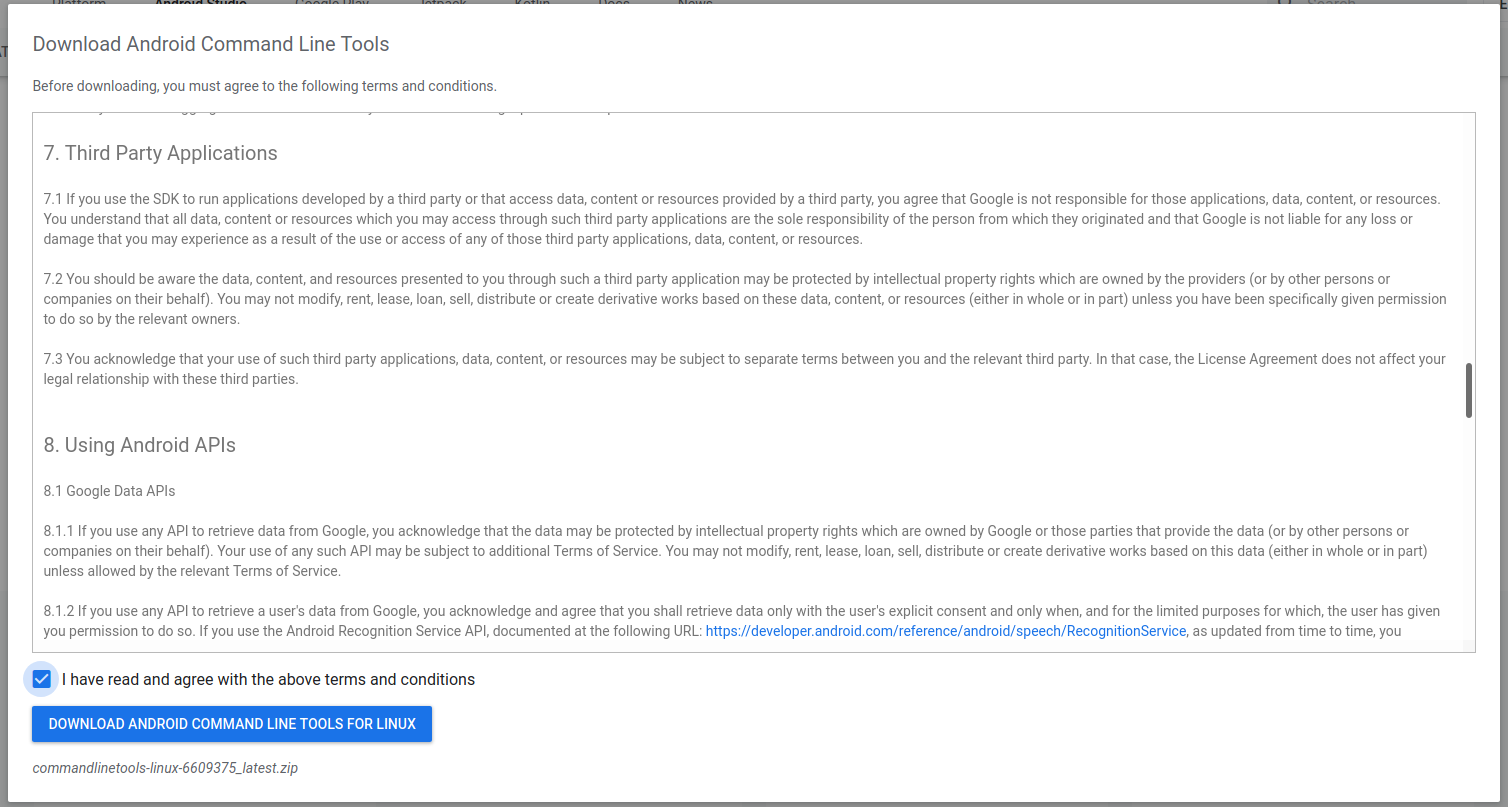
Fig 2
Go through the details, agree to the terms and conditions, and click the Download Button to start the download.
Install SDK Tools
In this step, we will install the Android SDK Tools on Ubuntu. Create a directory having the name set to android-sdk and extract the content of the downloaded SDK Tools zip to this directory. Create another directory android-sdk/cmdline-tools to store the platform-tools. Make sure that the tools directory is available directly within the android-sdk/cmdline-tools directory created by us.
Download and Install Platform Tools
In this step, we will install the Android Platform Tools on Ubuntu. Follow the same steps similar to Android SDK Tools as shown in Fig 3, Fig 4, and Fig 5 to install Android Platform Tools using the download link.
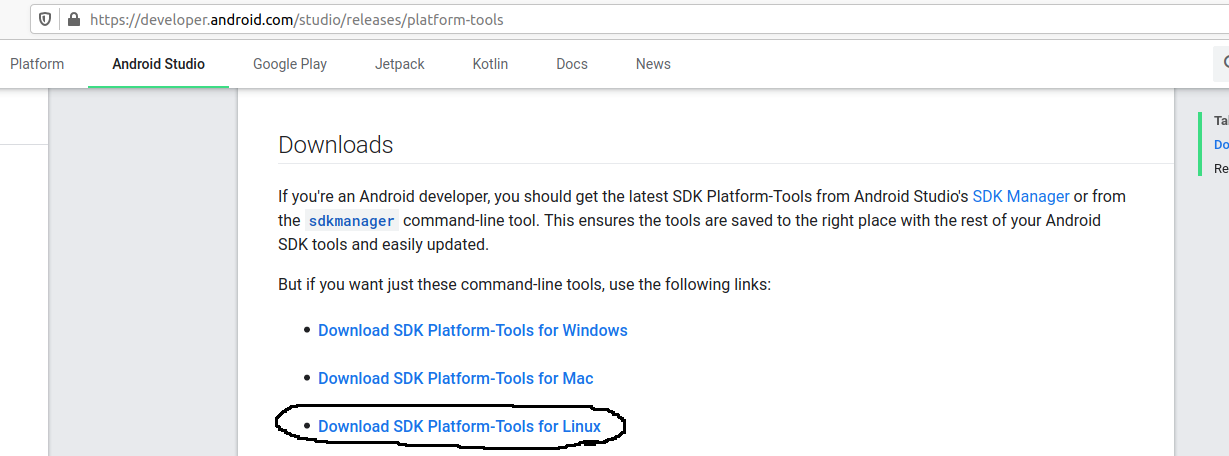
Fig 3
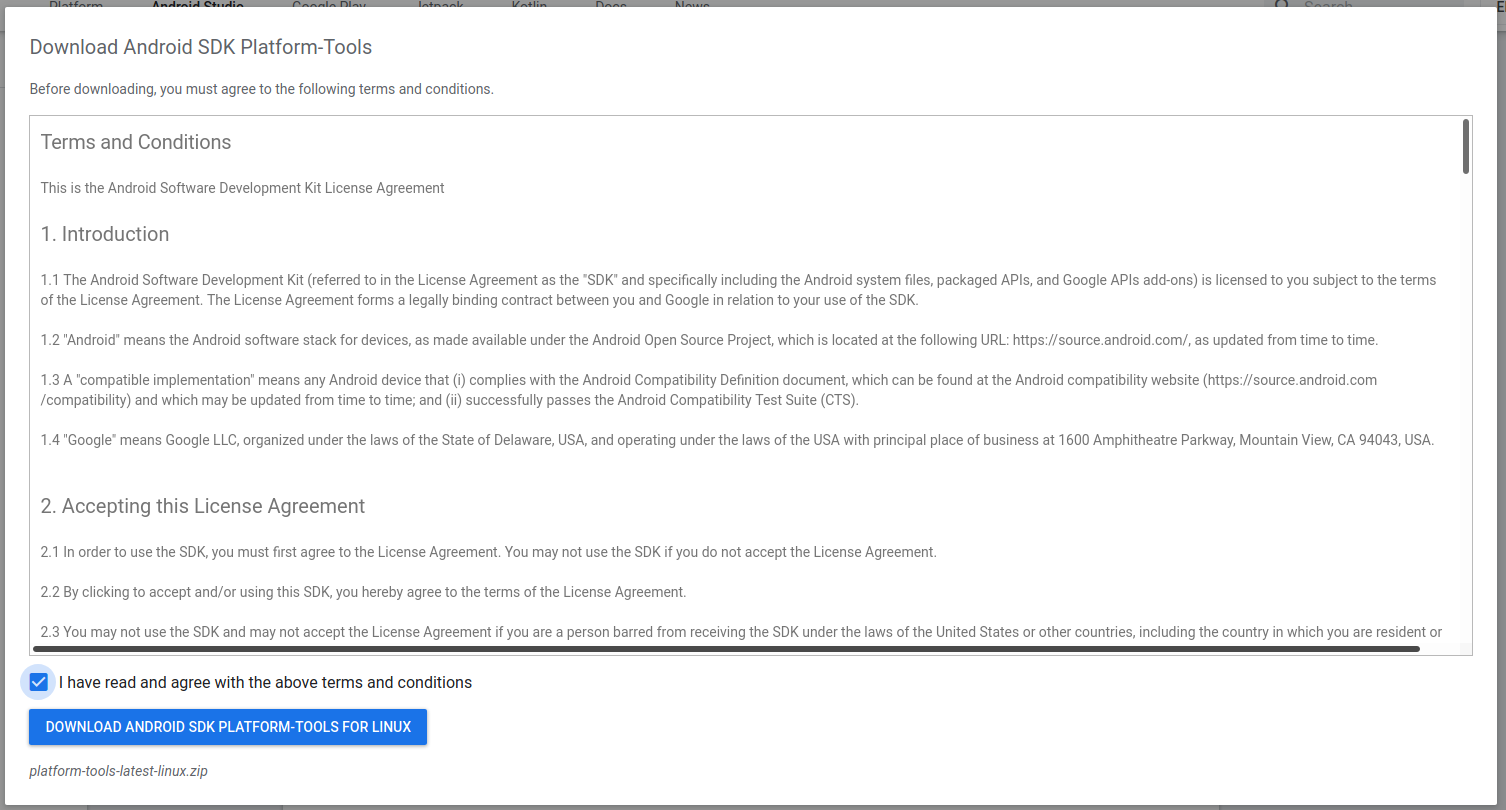
Fig 4
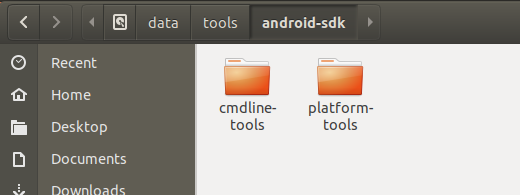
Fig 5
Make sure that the platform-tools content is available within the directory platform-tools. The directory structure should be similar to:
android-sdk
|----platform-tools
|----cmdline-tools
|----|----tools
Configure Environment Variable
In this step, we will configure the environment variable to use the SDK tools installed by us. There are two ways to do it. In the first approach, we can update the .bashrc file of the user account. Another approach is to update /etc/profile file which works for all the accounts.
Approach A
Update .bashrc file of the user account.
# Update Bash
sudo nano ~/.bashrc

# Add at the end of the .bashrc file

# Android - SDK Tools & Platform Tools
export ANDROID_HOME=/data/tools/android-sdk
export PATH=/data/tools/android-sdk/platform-tools:/data/tools/android-sdk/cmdline-tools/tools:/data/tools/android-sdk/cmdline-tools/tools/bin:${PATH}

# Save .bashrc

# Reload Bash
source ~/.bashrc
Notes: Replace the android sdk path based on your installation directory.
Approach B
Update /etc/profile file.
# Update profile
sudo nano /etc/profile
Scroll down by pressing the Page Down Button and add at the end of this file:
# Java 15
JAVA_HOME=/usr/java/oracle/jdk-15.0.1
PATH=$PATH:$HOME/bin:$JAVA_HOME/bin
export JAVA_HOME
export PATH

# Android SDK Tools and Platform Tools
export ANDROID_HOME=/data/tools/android-sdk
export PATH=$PATH:$ANDROID_HOME/cmdline-tools/tools/bin
export PATH=$PATH:$ANDROID_HOME/platform-tools

# sdkmanager fix for java 9 and 10
#export JAVA_OPTS='-XX:+IgnoreUnrecognizedVMOptions --add-modules java.se.ee'
Make sure that you provide the correct path to the android-sdk directory.
Now press Ctrl + O and press Enter to write our change. Press Ctrl + X to exit the nano editor. The nano editor should look like the one shown in Fig 6.
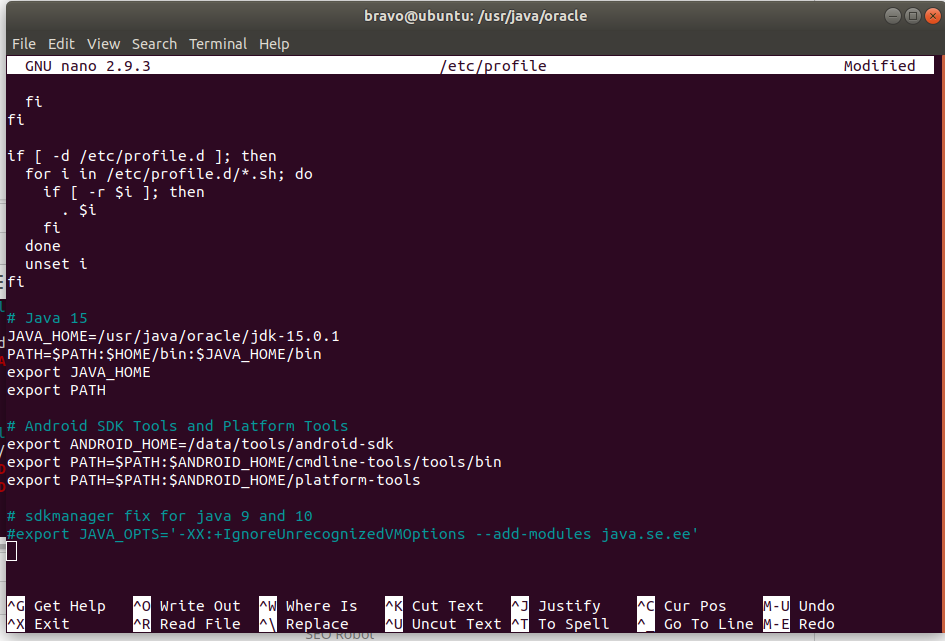
Fig 6
Notes: Approach B didn't work for me.
Now test the Android SDK installed by us using the environment variables configured by us.
# Check adb version
adb --version

# Output - It must show the installed adb version
Android Debug Bridge version 1.0.41
Version 30.0.4-6686687
Installed as /data/tools/android-sdk/platform-tools/adb


# Check sdkmanager version
sdkmanager --version

# Output - It must shown installed sdkmanager version
4.0.1
Using the SDK Manager
Update SDK Manager - Update the SDK manager using the below-mentioned command.
sdkmanager --updateList - We can list the installed and available packages and images using the list command as shown below.
// List all the installed and available platforms, system images and other resources
sdkmanager --list

// Output should look like
Installed packages:=====================] 100% Computing updates...
  Path           | Version | Description                       | Location
  -------        | ------- | -------                           | -------
  platform-tools | 30.0.4  | Android SDK Platform-Tools 30.0.4 | platform-tools/

Available Packages:
...
...

// We can see that it shows the platform-tools installed by us
Install Platform - Use the below-mentioned command to install the Android 10 (API level 29) using the SDK manager.
# Start downloading the most recent package
sdkmanager "platforms;android-30"
It will ask to accept the terms and conditions. Enter y and hit Enter Key to accept the terms and conditions. This command creates the directories licenses and platforms within android-sdk and installs the package android-30 within the platforms directory having all the required files to run the emulator for Android 11.
If we again check the installed packages, the list command shows the installed options as shown below.
# List
sdkmanager --list

# Output
Installed packages:=====================] 100% Computing updates...
  Path                 | Version | Description                       | Location
  -------              | ------- | -------                           | -------
  platform-tools       | 30.0.4  | Android SDK Platform-Tools 30.0.4 | platform-tools/
  platforms;android-30 | 3       | Android SDK Platform 30           | platforms/android-30/

Available Packages:
...
...
After installing the platforms, the directory structure should be:
android-sdk
|----cmdline-tools
|----|----tools
|----license
|----platforms
|----platform-tools
Add System Image - We can add system image from available images shown by the list command using the SDK manager as shown below. We are adding the most recent default 64-bit system image.
// Install default system image for platform android-29
sdkmanager "system-images;android-29;default;x86_64"
Accept the License Agreement to complete the download. There are several projects which need Google Play Services. We need system images specific to Google Play Services as shown below.
// Install Google Play Services system image
sdkmanager "system-images;android-29;google_apis_playstore;x86_64"
Now again use the command list as shown below.
# List
sdkmanager --list

# Output
Installed packages:=====================] 100% Computing updates...
  Path                                                  | Version | Description                                | Location
  -------                                               | ------- | -------                                    | -------
  emulator                                              | 30.1.5  | Android Emulator                           | emulator/
  patcher;v4                                            | 1       | SDK Patch Applier v4                       | patcher/v4/
  platform-tools                                        | 30.0.4  | Android SDK Platform-Tools 30.0.4          | platform-tools/
  platforms;android-30                                  | 3       | Android SDK Platform 30                    | platforms/android-30/
  system-images;android-29;default;x86_64               | 7       | Intel x86 Atom_64 System Image             | system-images/android-29/default/x86_64/
  system-images;android-29;google_apis_playstore;x86_64 | 8       | Google Play Intel x86 Atom_64 System Image | system-images/android-29/google_apis_playstore/x86_64/

Available Packages:
...
...
After installing the default system image, the directory structure should be:
android-sdk
|----cmdline-tools
|----|----tools
|----emulator
|----license
|----patcher
|----platforms
|----platform-tools
|----system-images
Install Emulator - You might be required to install the emulator before creating the AVD using SDK Manager. The emulator gets installed while adding the system images in the previous steps.
// Install Emulator
sdkmanager --channel=3 emulator
Install Build Tools - Install the most recent build tool listed by the list command.
// Install Build Tools
sdkmanager "<build tools version>"

// Example
sdkmanager "build-tools;30.0.2"
After installing the build tools, the directory structure should be:
android-sdk
|----build-tools
|----cmdline-tools
|----|----tools
|----emulator
|----license
|----patcher
|----platforms
|----platform-tools
|----system-images
|----tools
Now again use the command list as shown below.
# List
sdkmanager --list

# Output
Installed packages:=====================] 100% Computing updates...
  Path                                                  | Version | Description                                | Location
  -------                                               | ------- | -------                                    | -------
  build-tools;30.0.2                                    | 30.0.2  | Android SDK Build-Tools 30.0.2             | build-tools/30.0.2/
  emulator                                              | 30.1.5  | Android Emulator                           | emulator/
  patcher;v4                                            | 1       | SDK Patch Applier v4                       | patcher/v4/
  platform-tools                                        | 30.0.4  | Android SDK Platform-Tools 30.0.4          | platform-tools/
  platforms;android-30                                  | 3       | Android SDK Platform 30                    | platforms/android-30/
  system-images;android-29;default;x86_64               | 7       | Intel x86 Atom_64 System Image             | system-images/android-29/default/x86_64/
  system-images;android-29;google_apis_playstore;x86_64 | 8       | Google Play Intel x86 Atom_64 System Image | system-images/android-29/google_apis_playstore/x86_64/

Available Packages:
...
...
Using the Emulator and AVD Manager
Create AVD - Create the AVD using the system image downloaded in the previous step as shown below. Replace <emulator name> with actual name.
// Create the emulator using default system image
avdmanager create avd -n <avd name> -k "system-images;android-29;default;x86_64" -g "default"

# Example:
avdmanager create avd -n test1 -k "system-images;android-29;default;x86_64" -g "default"

// Create emulator using Google Play Services system image
avdmanager create avd -n <avd name> -k "system-images;android-29;google_apis_playstore;x86_64"

# Example:
avdmanager create avd -n gtest1 -k "system-images;android-29;google_apis_playstore;x86_64"
The above commands ask a bunch of questions to configure the AVD if we choose the custom hardware profile option. We have excluded the details of these options from this tutorial since these configuration details depend on the actual needs. After completing all the configurations, it creates the AVD using the name provided by us while configuring it.
List AVDs - Now go to the tools directory(only required in case you have omitted to add tools path to PATH while configuring environment variables) on the command line and check the installed platform as shown below.
# List the available AVDs using avdmanager
avdmanager list avd

# Output
Available Android Virtual Devices:
    Name: gtest1
    Path: /home/bravo/.android/avd/gtest1.avd
  Target: Google Play (Google Inc.)
          Based on: Android 10.0 (Q) Tag/ABI: google_apis_playstore/x86_64
  Sdcard: 512 MB
---------
    Name: test1
    Path: /home/bravo/.android/avd/test1.avd
  Target: Default Android System Image
          Based on: Android 10.0 (Q) Tag/ABI: default/x86_64
  Sdcard: 512 MB

# CD - tools directory
cd /data/tools/android-sdk/tools

# List the available AVDs using emulator
./emulator -list-avds

# Output
gtest1
test1
It will list all the AVDs installed by us.
Launch AVD - We can launch the AVD using the emulator as shown below.
# Change directory
cd /data/tools/android-sdk/tools

# Launch AVD
./emulator -avd <avd name>
The above command might show an error specific to the qt library. We can execute the emulator from the Android SDK Tools directory in such a case.
The emulator will take some time to completely launch the AVD. The final results should look similar to the one shown in Fig 7.
Notes: I have used Ubuntu 18.04 LTS installed as VM using VMware Workstation Player, hence I have enabled the Virtualization for my Virtual Machine.
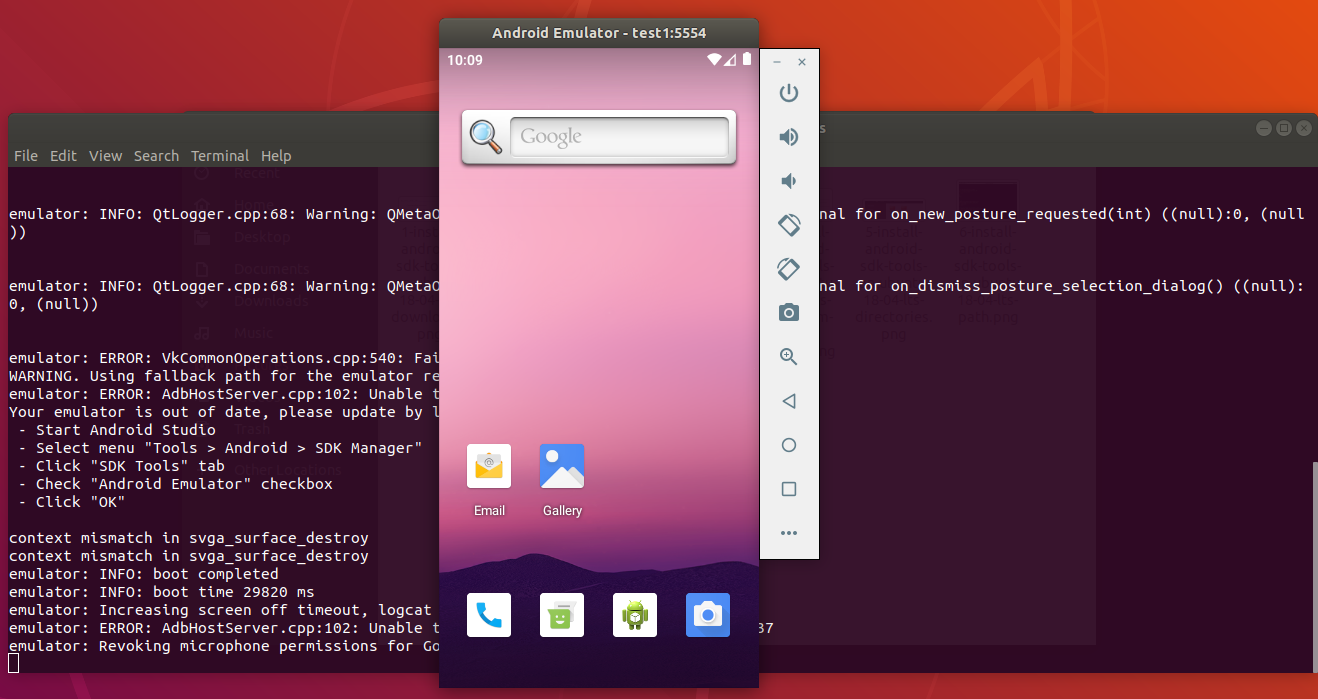
Fig 7
Delete Emulator - We can also delete an existing emulator as shown below.
// Delete Emulator
avdmanager delete avd -n <emulator name>
Summary
This tutorial provided all the steps required to install Android SDK Tools and Android Platform Tools on Ubuntu 18.04 LTS. It also provided the steps required to launch the first AVD using the Android Emulator.


